How do I read chord diagrams on guitar?
What are chord diagrams?
No, you can’t eat them! 😛 There are various types of diagrams. Apart from being incredibly useful for quickly visualizing a chord, they are also easy to remember because you don’t need to memorize notes or intervals (even though you definitely should be able to memorize them!).
There are different types of diagrams for the guitar.
Chord Diagrams in Sheet Music
This variation with the chords directly in the notation is very clear, and you can easily and quickly explain the voicing.
Below the diagrams, the fingers are marked. So, number 1 means that this string/fret should be pressed with the index finger. Number 2 with the middle finger, and so on.

If these diagrams didn’t exist, it would look like this on the tabs:

Or even worse; with Notes! :P

Of course, it’s not going to be impossible to learn forever. Over time, you’ll get used to tabs and sheet music as well. So, it’s not necessarily a bad idea to learn these chords by heart as quickly as possible to then be able to the tabs or the sheet music by heart.
Arpeggio Diagrams
It doesn’t always have to be chords that can be written on diagrams. Scales and arpeggios can also be notated with diagrams.
Remember, that scales and arpeggios are not played together. Well, our five fingers wouldn’t be enough to play a scale simultaneously anyway, but it also wouldn’t work from a purely guitar technique perspective (two Notes on the same string is just not possible).
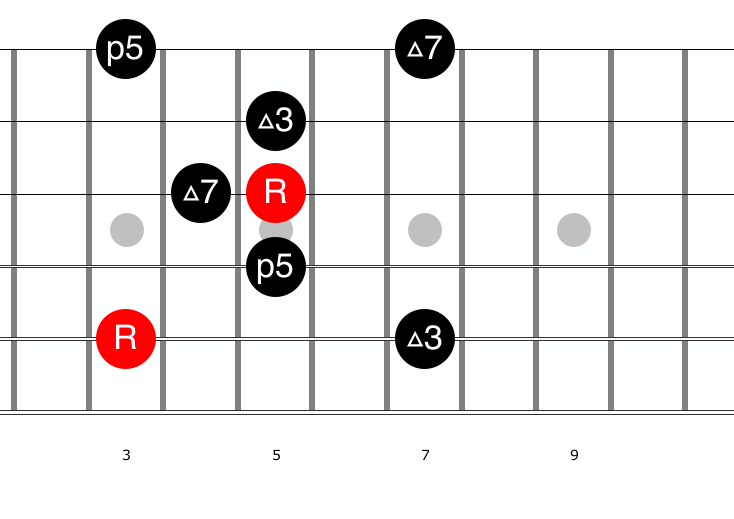
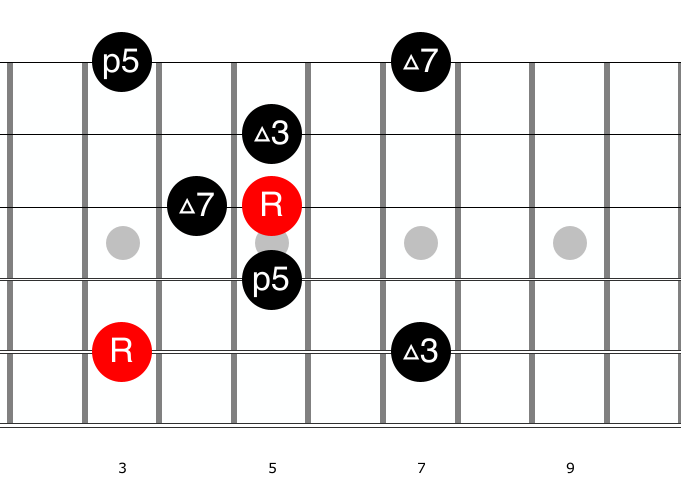
In this case, it should be noted that we start from the root note (the red ‘R’) and then move to the right. Once there is no note / finger left on a string, you can move on to the next string and start from the left again.
Without the diagram, the C Major 7 arpeggio would look like this.

Scale Diagrams
Now, onto the last part: scales.
Scales can also be written as diagrams. The principle is the same again. We start from the bottom left (which is the lowest sounding string on the guitar).
Then we move to the right, and as soon as a string is ‘exhausted,’ we move to the next string and start from the left again.
Pay attention that the notes should go from low to high. If this isn’t the case, you might be starting on the wrong string.

Thanks to this diagram, we are protected from further calamity, such as sheet music for instance. :P

I know, it’s funny to speak bad about sheet music. Nevertheless, sooner or later, one should consider learning to read sheet music. :)
How to Read Diagrams
In general, diagrams are quite simple in structure. You just need to, as always, know how to read them and where to start from.
Here are a few examples:
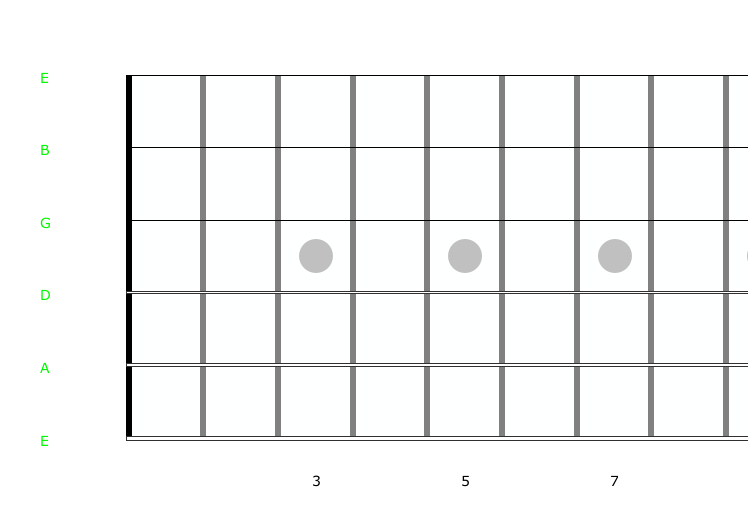
In this example, we have an empty guitar fretboard diagram. On the far left (in green), you can see the names of the open strings. The diagram is upside down. Pay attention to the thickness of the strings. The lowest string (which produces the lowest pitch on the guitar) is the thickest string.
Chords with open strings
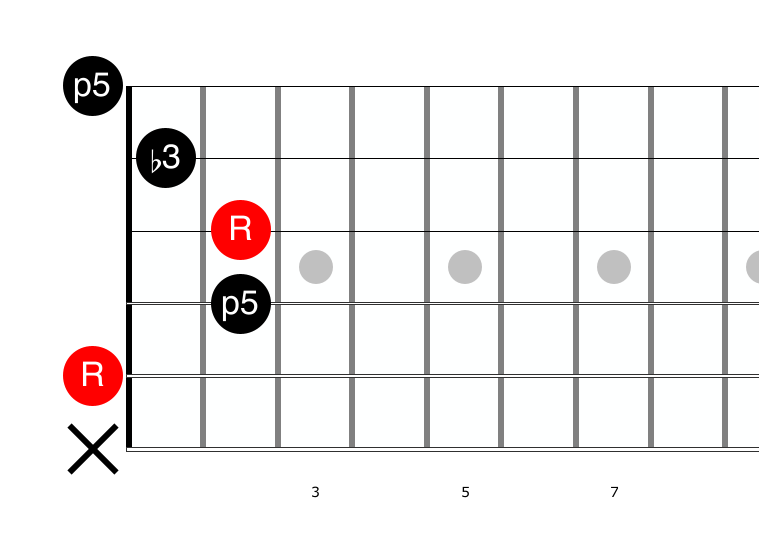
In this chord diagram, we see an A minor chord. The low E string (at the bottom of the diagram) should not be played, which is why it is marked with an ‘X.’
The red notes with ‘R’ are root notes. In an A minor chord, like in this example, the root note is an ‘A’.
Barre Chords
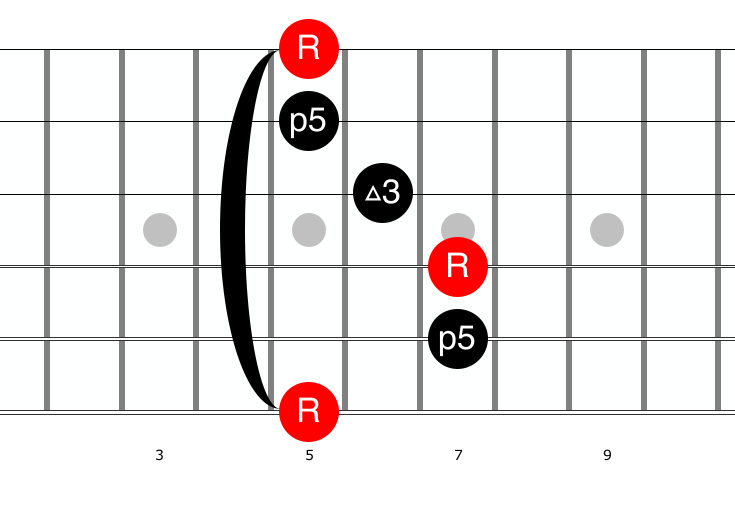
The black bar at the beginning of a chord means that you have to press down all the strings with your left hand index finger.
This way of playing a chord is called a ‘barre chord.’
Arpeggios
As briefly explained earlier, when playing an arpeggio, we start from the root note on the far left. In this example, we begin in the 3rd fret on the A string.
Then, we move to the right (towards the third) and jump to the next string. We always try to ‘finish’ one string before moving on to the next.
Of course, when improvising or writing songs, you don’t have to play them in a row. This is just for practice.
Scales
When it comes to scales, we also start on the root note and move to the right until there are no more notes on that string.